Do you know that polishing with acrylic substantially improves the surface finish? You can make the surface shiny, transparent, and appealing.
In caravans and motorhomes, there are many parts made of acrylic since they are lightweight. These parts are glossy and shiny and look similar to glass, the most common parts are acrylic windows. But over time they lose their original look and might require proper polish.
In this article, we’ll look at how to polish acrylic in a step-by-step guide, but it is worth learning about the many methods for polishing acrylic sheets including one used on productions.
What is Acrylic Polishing?
Credit: archplastics
Acrylic items are polished because they have an excellent finish; this is because acrylic items are prone to dents and other undesirable features. If you want the perfect shapes in the end product, you’ll need to polish these sections properly.
A product that has a professional finish is more likely to sell than one that does not. Professional finesse can be found in a polished acrylic product. As a result, acrylic items must be nicely polished for both marketing and professionalism. First, let us see how to polish acrylic.
Acrylic Polishing: A Step-by-Step Guide
Acrylic polishing is both an art and a science, which means that we need to incorporate the established techniques in a creative approach. In this section, we’d like to focus on the exact polishing procedures that will help you grasp both the science and the art of polishing.
Step 1: Preparation
One of the most crucial things to perform in this phase is organizing all of the elements you intend to employ in your project. By this, we mean that you should think about how you’ll manage your workplace and where you’ll put all of the supplies you’ll need.
The goal is to complete this task much more quickly and successfully once you get started.
Step 2: Determine the polishing compounds.
Acrylic polishing is pretty basic in the sense that the majority of the compounds you’ll use will differ depending on the brand and preferred technique. If you want the maximum result, you’ll have to use a particular polishing agent in most circumstances.
As a result, deciding on the best one ahead of time will make it easier to improve the process efficiency.
Step 3: Cleaning and Sanding
This is to be the starting point for the entire project. It is also recommended that you clean your workpiece carefully before polishing it. You should also think about if the sheet has to be sanded.
A good rule of thumb is that if your fingernail can catch the border of a scrape, you should sand it first. When filing, make sure you use a constant motion and avoid cross-hatching.
While you’re doing it, make sure to follow the grain of the material, especially if it’s visible. So you’ll have to keep sanding until all of the scratches are gone, and you’ve achieved a fine texture.
Step 4: Using a Polishing Product
In this instance, all you need to do is coat the polishing product with it and spin the buff gently against it. While you’re doing it, make sure to use the compound cautiously because it only takes a tiny bit to get it to operate appropriately.
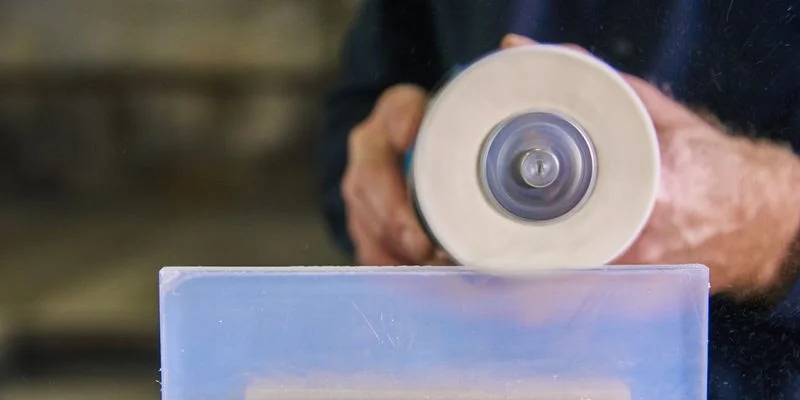
If you’re using a buffing wheel, now’s the time to start spinning it to polish the plastic corners and material surface. Allow the covered buff to shine the acrylic sheet while applying light pressure.
As you continue to buff, you will see a residue coming from the acrylic material. However, it would be best if you kept polishing by reapplying more compounds as needed.
Acrylic edge polish with a buffing wheel – Credit: plexiglas
Step 5: Apply a fine compound for an excellent finish.
To achieve a mirror-like finish, you must complete your project with the best available compound. While doing it, make sure you’re using light pressure and letting the buff do the work for you.
Step 6: Wash and apply a coat of paint
After you’ve finished your job, wash the material with warm water to remove any extra residue or buffing agent.
To dry your work, use a piece of fabric. Then, coat the material based on the type of material you’d like to use. Simply put, it’s that easy.
Extruded or Cast acrylic?
Cast acrylic is usually considered as greater quality than extruded acrylic even though it is in fact two different materials. Cast acrylic is produced by mixing the acrylic liquid ingredients in molds but, extruded acrylic is produced by continuously pushing acrylic mass through a form, while the chemical process takes place.
It is necessary to determine whether the acrylic sheet is extruded or cast before cleaning it.
When working with extruded sheets (Plexiglas XT), you must remember the effort you use to sand and polish them. These sheets are more likely to melt, resulting in a thick, gooey edge. Cast acrylic, on the other hand, does not have this problem.
Cast and extruded acrylic have their advantages and disadvantages but for us, the most important is that both are lightweight. However, cast acrylic is a more expensive material it is the first choice for RV manufacturers and owners due to better characteristics like strength, chemical resistant, UV resistance or absorption, and high transparency.
Ways to Polish Acrylic
Vapor Polishing
This is a popular acrylic polishing technique that several people employ regularly. It entails using a solvent vapor that tends to flow across the acrylic surface, resulting in a transparent finish.
This plastic polishing procedure is only for clear plastics. It can polish interior features and offers a pleasant outcome for see-through applications.
Due to its numerous benefits, vapor acrylic polishing is undoubtedly the most preferred way of polishing this material.
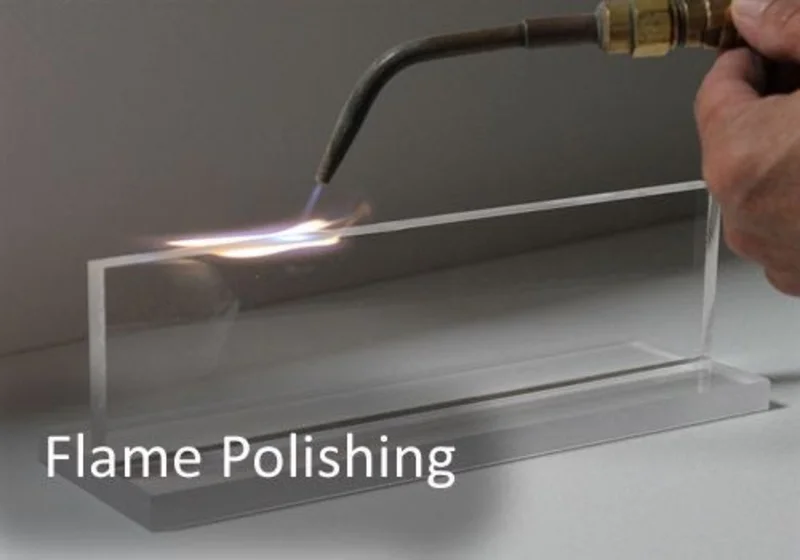
Flame Polishing
Another systematic method for polishing acrylic is to use abrasives. As the name implies, this kind of polishing makes use of a delicate high-temperature hydrogen-based flame.
Flame polishing has the advantage of being used on any size, form, or cut acrylic. On generally flat and exterior surfaces, however, it is more or less effective.
This procedure, if done correctly, can give you some of the cleanest finishes on the acrylic material you’ve ever seen.
Buffing
Buffing is a traditional polishing procedure that smooths the surface of all types of plastics. This polishing process is typically utilized on the outside surfaces of rather significant components. Nonetheless, it achieves a satisfactory result.
You must also guarantee that the spinning wheel is efficient during the procedure if you use this strategy; it needs to incorporate a special cutting compound that allows it to leave tiny scratches on the acrylic sheet’s surface.
It allows you to achieve a slight haze or uneven texture, which is exceptionally impressive and appealing.
Conclusion
As you can see, acrylic polishing is a fascinating and time-consuming process.
We are confident that after reading this article, you now have a better understanding of what acrylic polishing is and what it includes.
You have picked up a few tips and methods for acrylic polishing. So, the next time you consider performing this procedure, keep in mind that you have all the necessary knowledge in this guide.


")


")