We and nearly every tourist is using a lot of gadgets and electricity became an integral and essential part of caravanning. Every RV, caravan, or motorhome is equipped with a leisure battery, but what gives you full freedom is the ability to charge your battery while camping with solar energy.
Here we quickly come to a necessity to install solar panels on your caravan, but if you own a caravan with a pop-top roof, then you may quickly meet a dilemma if every solar panel fits and how to make wiring the best way!
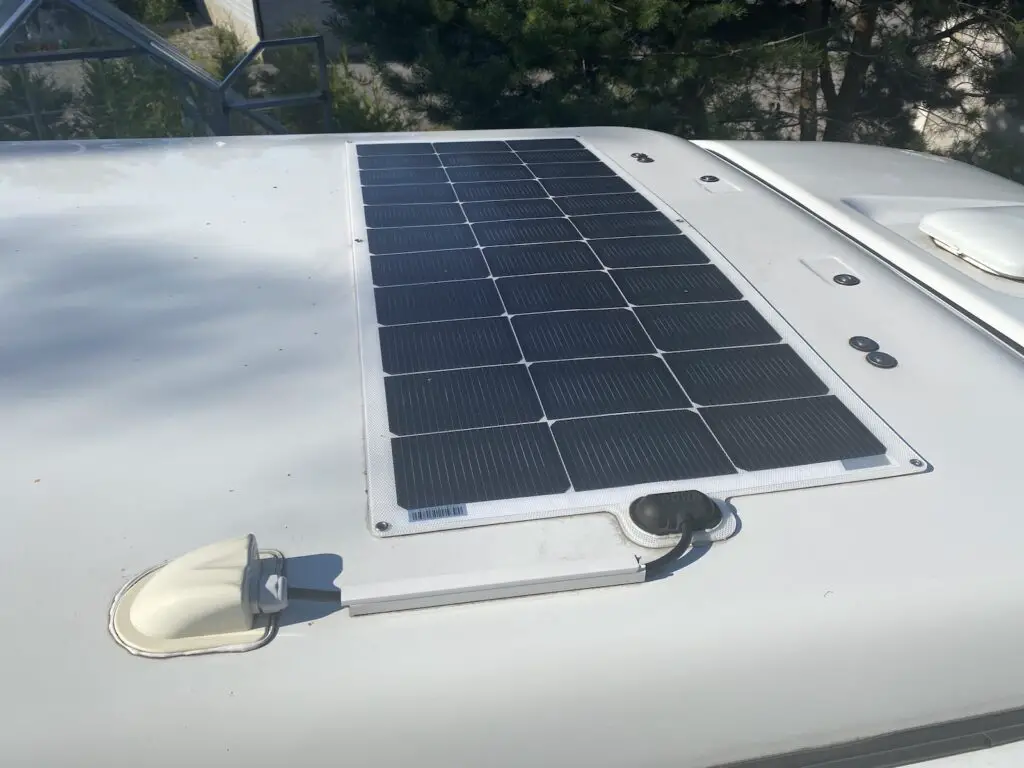
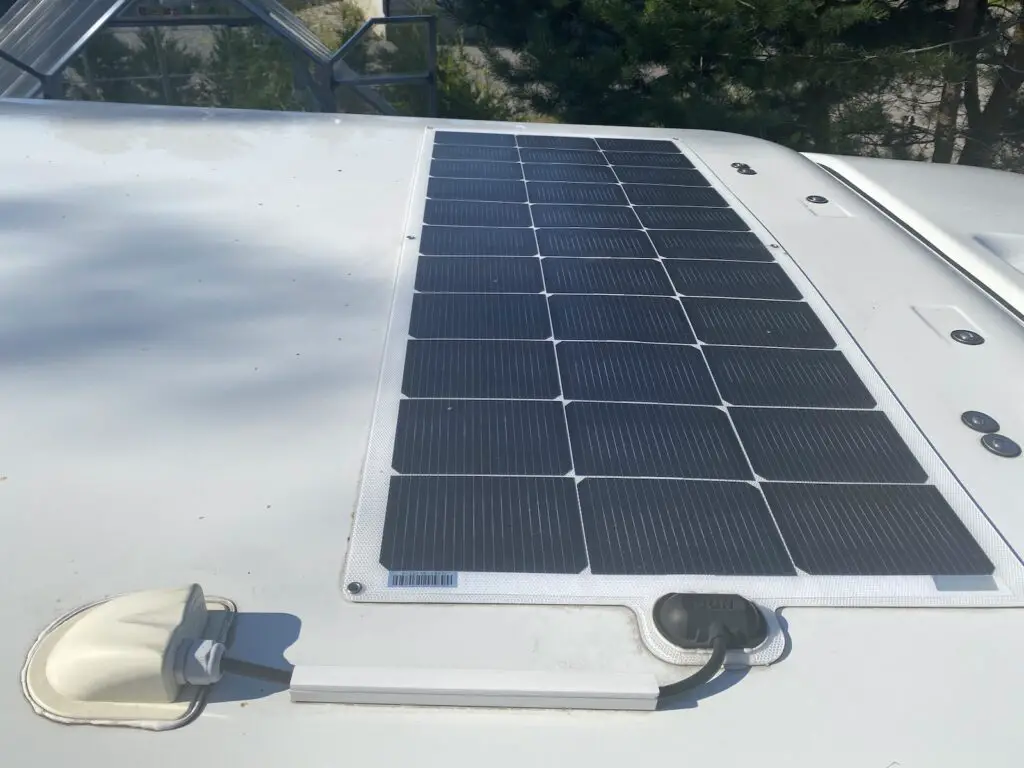
We own Eriba Troll 530 caravan with a pop-top roof the way we installed solar panel was tested by time and we still find it as a single correct way to mount it.
What type of solar panel is best for pop-top caravan?
There are two types of solar panels that you will find on the market: crystalline and thin-film PV panels. In my opinion, thin-film PV panels have more benefits for pop-top roof caravans.
The weight of these panels is significantly less and this is very important since this is a movable part, so you will prefer to keep the weight of the gear as low as possible.
Thin-film PV panels are flexible and this is a great advantage as the roof on these caravans is commonly not flat and you have to repeat the shape and profile of the roof. If you will select crystalline panels – you will have to higher mounting for the panel so that the middle part won’t contact and damage the surface.
Thin-film PV panel installed on the roof of Eriba caravan
Flexible thin-film PV panels have also smaller air-resistant surfaces while moving and the most important are nearly invisible on the roof, so you will keep the original look of your caravan.
How to stretch the wires from the pop-top roof?
Roughly speaking, all you need is just to attach the solar panel to the roof and pull the cable down to the controller where charging of the leisure battery is regulated and basic information is displayed. Wiring goes between the solar panel, control, and leisure battery, so plan the location of all elements in advance.
In our caravan, the battery is located under the sleeping bed, where we have enough space, easy access both for installation, maintenance, and visual control. The has rigid mounts to avoid any movements while driving.
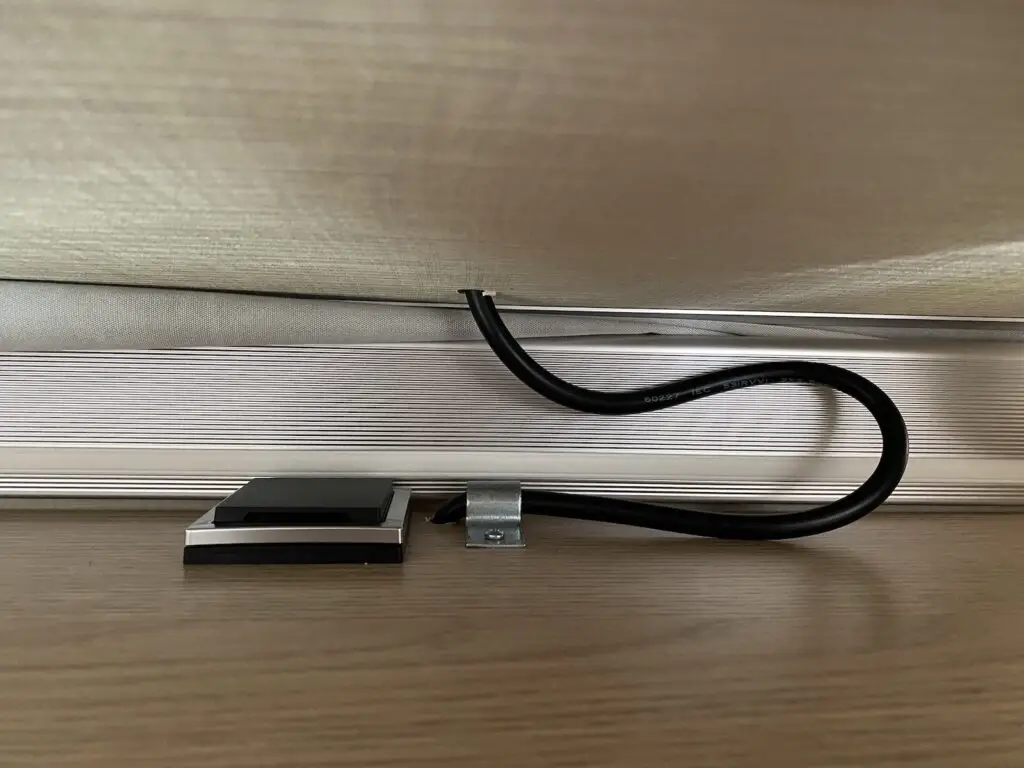
Since the roof can be raised and lowered, there should be enough slack for the wire.
There are several ways to route the wire from the solar panel to the controller that is, in our case, located inside the wardrobe in our caravan, close to the main power switch. The fundamental difference is in the location where you make a hole for the cable.
Wiring from solar panel to the controller in touring caravan with pop-top roof
Routing the power cable through the pop-top roof or fixed roof on one of the sides, depending on the location of the controller. I believe that the only acceptable way to route the cable is through the extendable part of the pop-top roof. In this case, you can hide the surplus length of the cable between the top plate of the wardrobe and the roof. In fact, you will never see the cable when the roof is lowered, but in the upper position, the cable goes straight up if the length is properly adjusted. Here is how the wiring looks in our Eriba caravan.
If you choose to drill the hole on the side of the fixed roof, you will be forced to leave the slack cable outside and this will look weird, especially in the lowered position of the roof.
Opinions may differ and it is up to the owner, but our recommendation route the cable through the movable part.
How to seal the wiring from the roof of the caravan?
Any owners of the caravan or motorhome want to make an additional or necessary hole. This easily can lead to leakage and wet damage in your RV, but mounting the solar panel will lead to a single one in any case.
As I mentioned above we made the hole in the pop-top roof itself. For proper sealing, I have purchased a 3M RV sealant and an additional waterproof double cable entry gland specially designed for boats, caravans, and motorhomes.
Additional part required for installing solar panel on the caravan
I’ve used a double cable gland since I still leave an option to install an additional solar panel, I won’t need to change the gland, but now I have to admit that it will require detaching the gland and drilling a new hole.
This comes with cable glands and a set of glue and cleaning fluid for secure attachment of mounting brackets to the roof of a boat, caravan, and motorhome.
3M sealant is a modern glue that adheres to both wet and dry substrates, but for good and safe installation, I cleaned, dried, and degreased the surface. The result of the wiring on the roof you can see on the photo made a few months after installation. Sett med lim og rensevæske for sikker festing av festebraketter til tak på båt, campingvogn og bobiler.


")